Prefer a visual walkthrough? Follow our tutorial to show variants as separate products in Shopify.
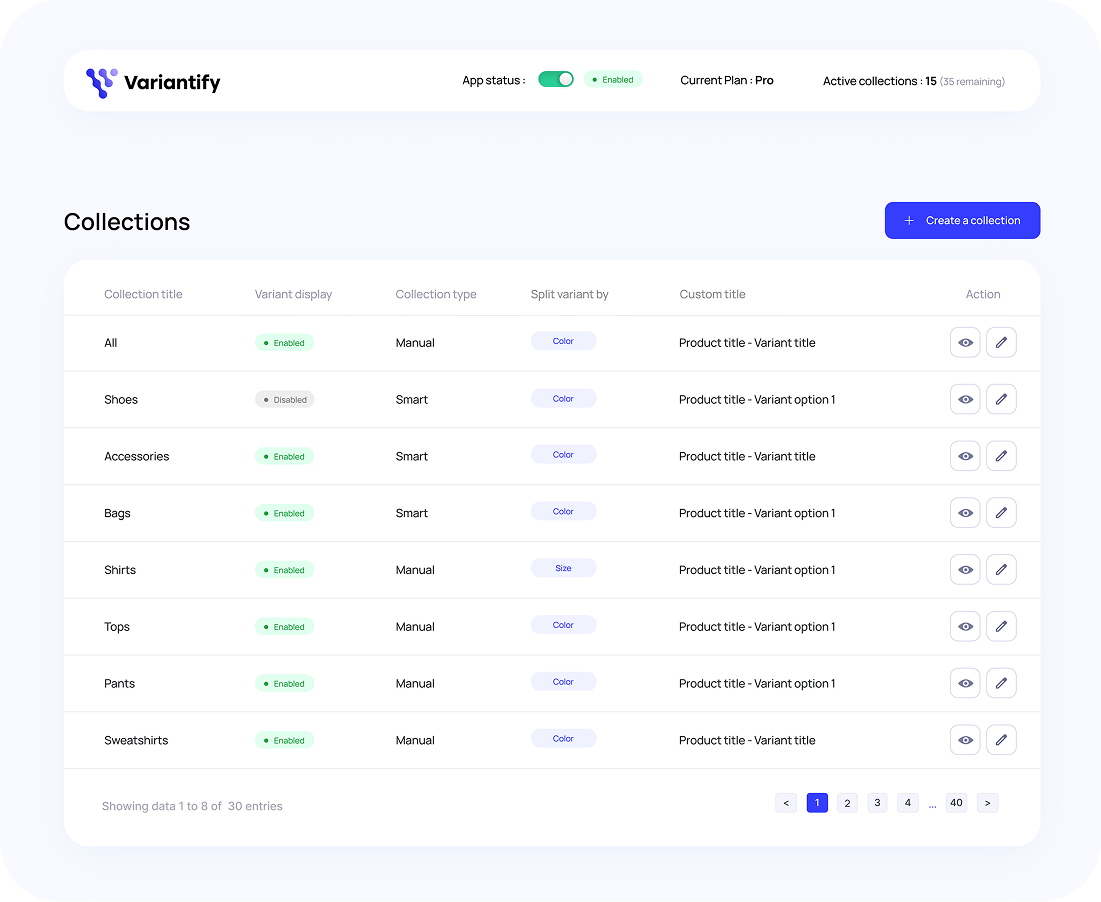
This section lists all your Shopify collections.
Collections created in Shopify will appear here automatically, and collections created in Variantify will also appear in your Shopify admin.
From this dashboard, you can:
⚠️ Collections created in Variantify are also created in Shopify Admin, under the Collections menu.
From the main view of the app, click on “Create Collection” to start.
Then, enter a collection title and an optional description to help identify your collection later.
If you choose Smart, products are automatically selected based on conditions you define.
For example:
Smart Collections automatically update when new products match these rules, no need for manual updates.
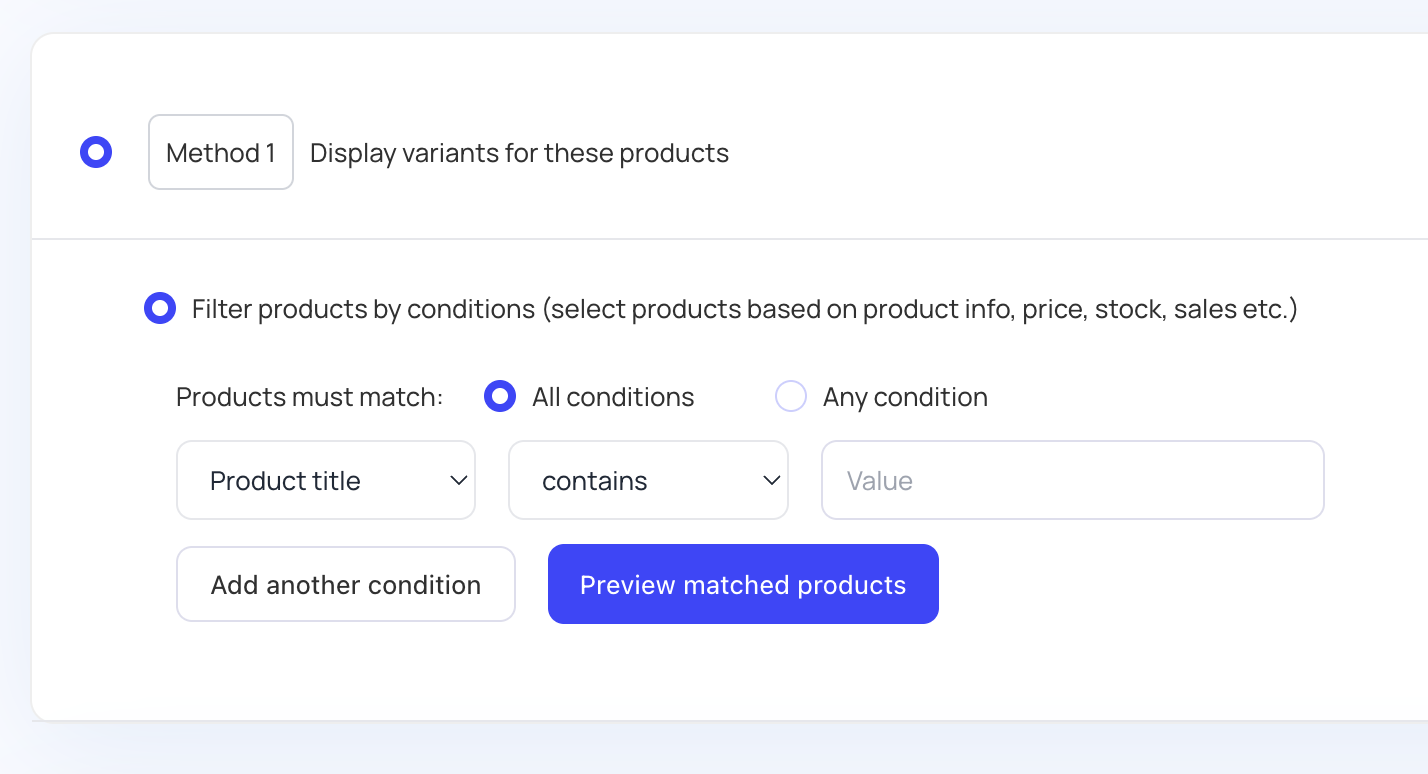
If you choose Manual, you have two methods:
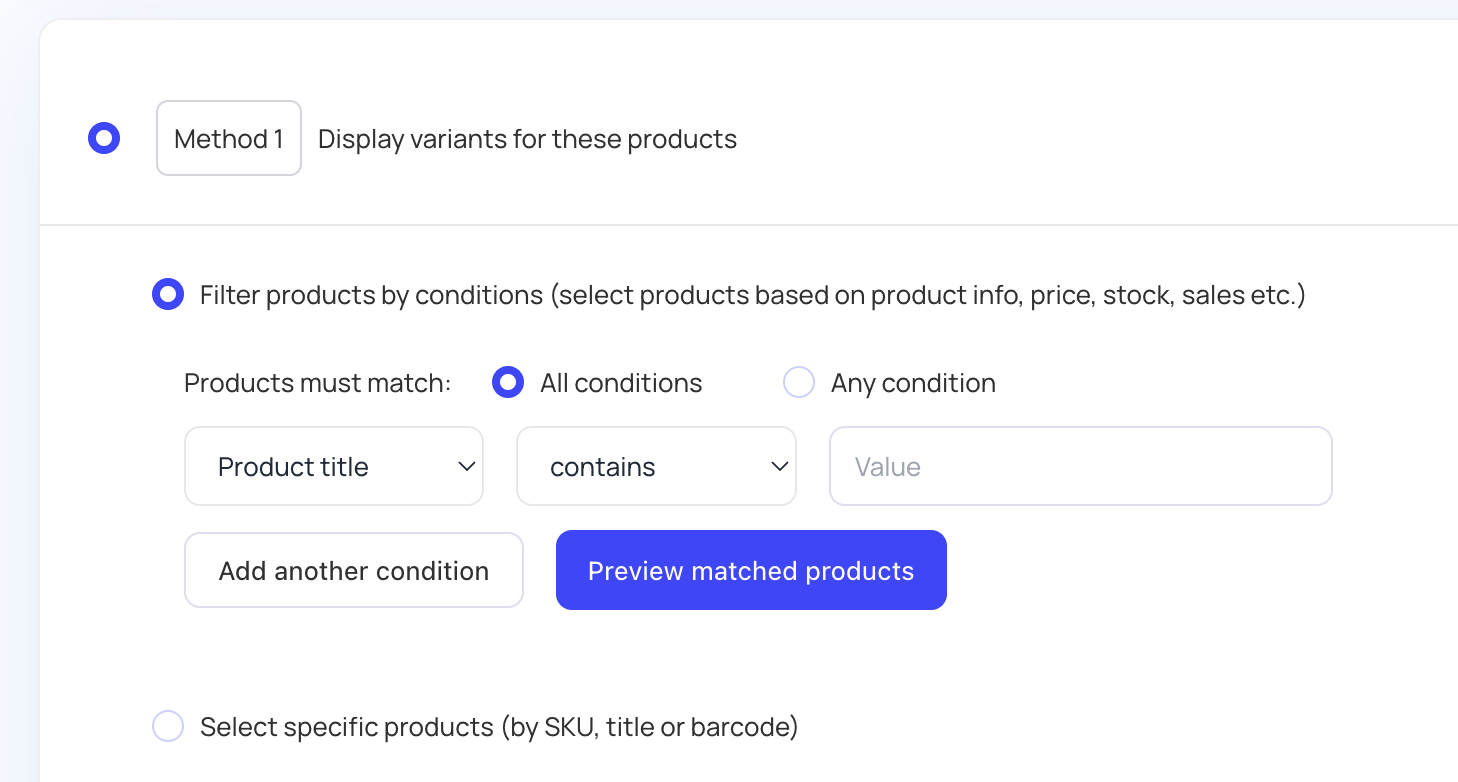
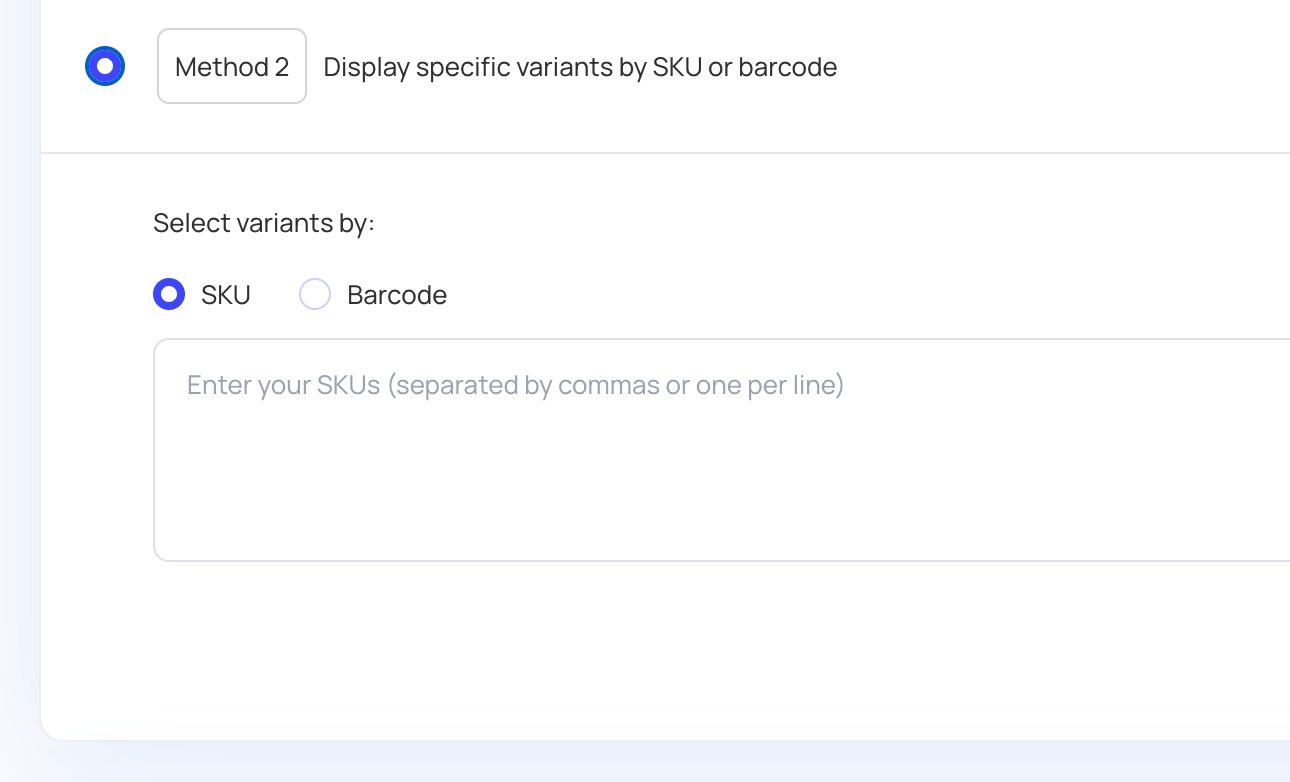
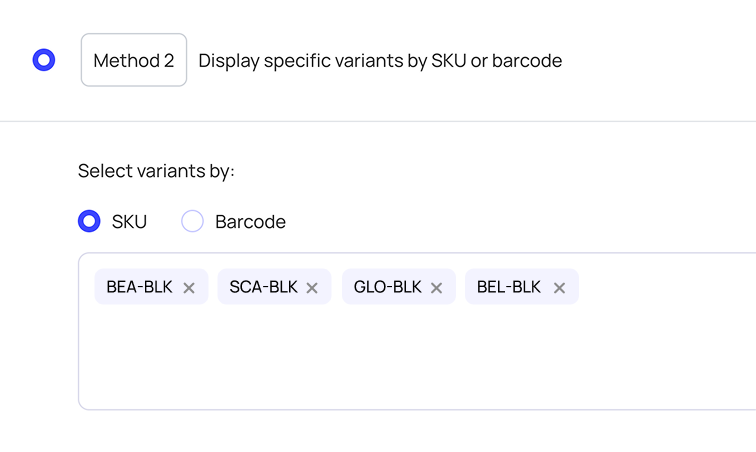
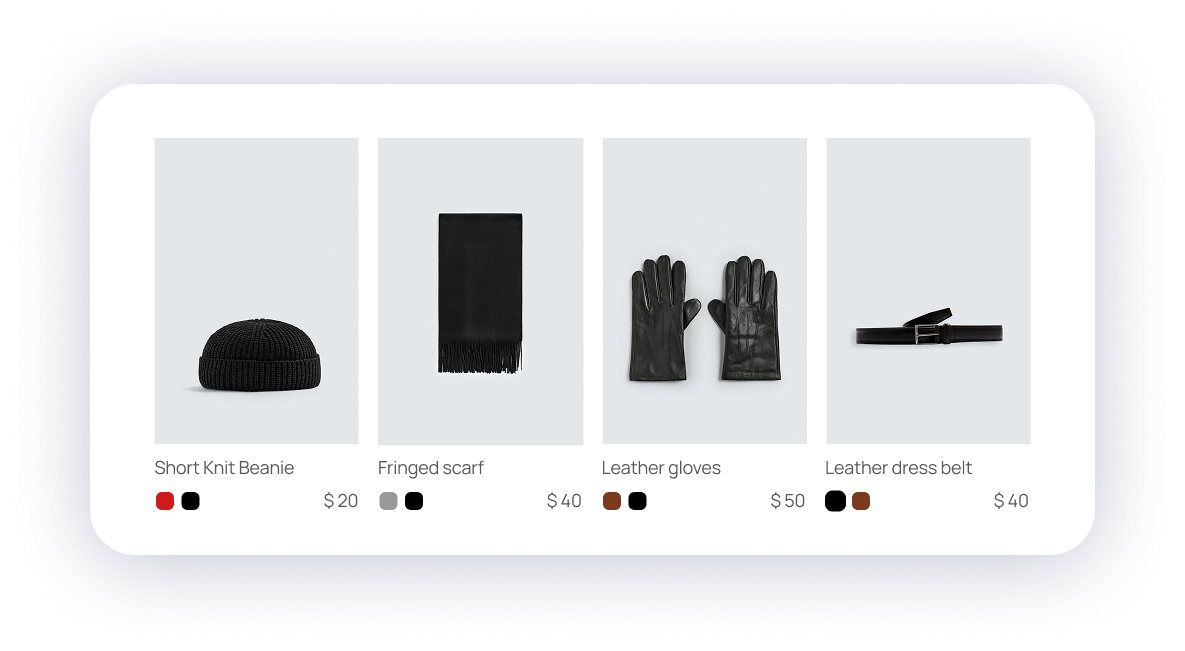
Method 2 is ideal if you want to display specific variants.
For example, if you want to create a collection that shows only black variants, you can add the SKUs of those variants, and only the corresponding variants will appear.
Select the product option used to split your variants (e.g., color, size, letter, etc.).
For example, this merchant selected the option letter to split his variants by letter.
Customize how your variant titles appear by choosing one of the following formats:
Format 1: Product title – Variant title
Format 2: Product title
Format 3: Product title – Option 1
Format 4: Product title – Option 2
For this example:
Product title: Eira Chair
Variant title: Blue / S
Option 1 (Color): Green
Option 2 (Size): Small
The results would be :
Format 1 : Eira Chair – Blue / S
Format 2 : Eira Chair
Format 3 : Eira Chair – Blue
Format 4 : Eira Chair – Small

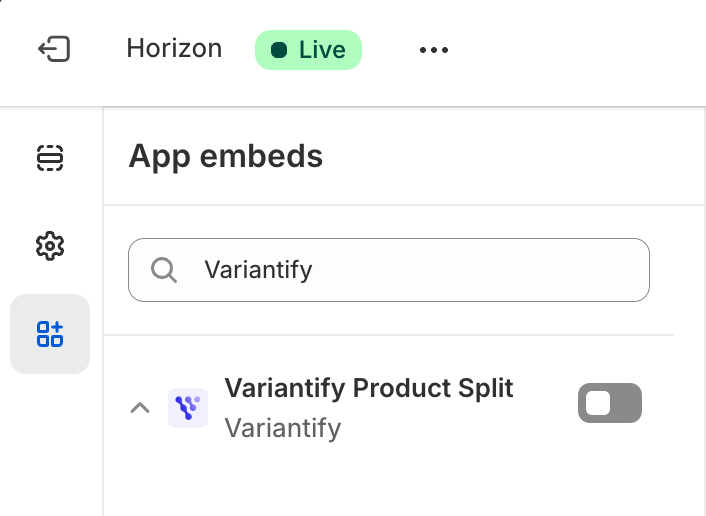
To disable Variantify across your entire store:
➡️ Simply turn off the App Embed in your Theme Settings.
If variants don’t appear as individual products after enabling display, see the troubleshooting FAQ.